Hey, you! Yes, you—the one scrolling for the next big thing in beauty. Stop right there. If you’re tired of shelling out big bucks at the salon or wrestling with chipped polish after a DIY gel session, I’ve got something you need to try: the Sassy Saints At-Home Nail Manicure Kit. I dove headfirst into this dip powder wonder after seeing it blow up online, and let me tell you, it’s a game-changer. Trust me, you’ll want this in your cart by the end of this article—your nails (and wallet) will thank you.
My First Impressions: Unboxing the Sassy Saints Magic

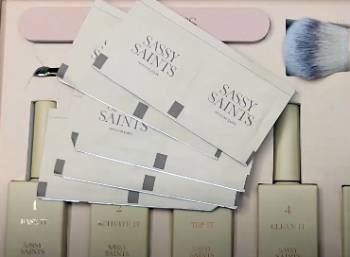
The box arrived, and I was already hooked. Sleek nude packaging with gold accents? It’s like Sassy Saints knew I’d Instagram this before even opening it. Inside, I found the essentials: a base coat (labeled “Base It”), an activator (“Activate It”), a top coat (“Top It”), a nail file, a cuticle pusher, a fluffy powder brush, and three dip powders of my choosing. I went with “Sultry Siren” (a red glitter vibe), “Vivacious Violet,” and “Cloudy Calm” because, why not? It’s marketed as salon-quality without the salon price tag, and I was ready to put that claim to the test.
The instructions were beginner-friendly, with a step-by-step video link I could follow. I’m no nail pro—my past DIY attempts looked like a toddler’s art project—so this felt like a lifeline. The promise? Up to three weeks of chip-free nails for £2.29 per manicure. At £69 on sale (down from £110), I figured it was worth a shot. Spoiler: I wasn’t disappointed, but it wasn’t all smooth sailing either.
My Real-User Take: The Highs, Lows, and Everything In-Between
I’ll be real with you—Sassy Saints isn’t flawless. My first attempt was a disaster. I didn’t prep right, slopped base on my cuticles, and ended up with lumpy nails that cracked in five days. I almost chucked the kit out. But I gave it another shot, watched the videos religiously, and nailed it (sorry, had to). By my third set, I was getting compliments left and right—my nails looked salon-fresh, and I felt like a DIY queen.
The removal process? Ugh, it’s a chore. Soaking in acetone dries my hands out, and I’ve had to nurse my nails back with oil. But that steam remover tip? Total win—cut the time in half and saved my sanity. The durability’s legit—two to three weeks if you do it right. My nails are stronger than ever, and I’ve ditched salon trips entirely. Sure, it’s time-consuming at first, but now it’s a chill 30-minute ritual with a glass of wine and my favorite show.
Customer service was hit-or-miss. They replaced my leaky bottle fast, but I had to cough up return shipping—annoying. Still, the community vibe online (20,000+ fans!) keeps me hooked. I’ve swapped tips with other users, and it’s like having a nail squad cheering me on.
Step-by-Step: How I Nailed the Application (Pun Intended)
Here’s how I tackled my Sassy Saints manicure. Follow along, and you’ll be slaying those nails too:
- Prep Like a Boss: I filed my nails to remove shine and pushed back my cuticles. No shine, no mercy—adhesion’s key.
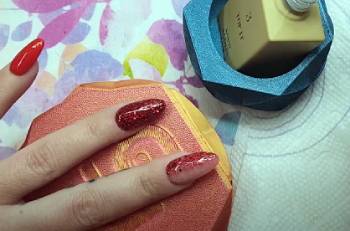
- Base It Up: I brushed on a thin layer of Base It, avoiding my skin (that’s a lifting trap). Then, I dipped my nail into the powder at a 45-degree angle—Sultry Siren shimmered instantly.
- Brush Off Excess: That fluffy brush? Lifesaver. I dusted off the extra powder, keeping it neat.
- Activate It: A generous coat of Activate It hardened the powder. I capped the edges for extra strength—learned that after my first cracked set.
- Repeat: Two more layers of powder and activator. Patience here is your BFF.
- File and Shape: I smoothed out bumps with the file. Too thick? Keep going. Too thin? Add another layer.
- Top It Off: Two thin layers of Top It, wiping the brush after each nail to keep it soft. Wait two minutes between coats—don’t rush this!
- Oil Up: Cuticle oil sealed the deal, keeping my nails healthy and shiny.
First time took me two hours. By my third go, I was down to 30 minutes. Practice makes perfect, folks.
Tips: How I Get the Most Out of Sassy Saints
You’ve got your Sassy Saints mani—now what? Here’s how I keep it popping and make it last:
- Prep is Everything: Skip this, and you’re toast. Remove all shine and keep product off your skin. I use a cotton pad with acetone to clean my nails first—game-changer.
- Layer Smart: Thin, even layers beat thick globs. I do four layers on weak nails—two vitamin powder, two color—for max strength.
- Cap Those Edges: Brush base, powder, and top coat over the tips. It’s like armor against chips.
- Infilling Over Removal: Instead of soaking off every time, I file down to the base layer and reapply color. Saves my nails from acetone hell.
- Moisturize Like Crazy: Post-removal, my nails are thirsty. I slather on cuticle oil and hand cream daily—keeps them from snapping.
- Clean Your Tools: Wipe bottle necks with the “Clean It” solution after each use. Stuck tops are a nightmare otherwise.
- Steam Removal Hack: I got a cheap steam remover off Vinted—15 minutes, and the dip slides off with coconut oil. Kinder than soaking, trust me.
I’ve stretched some sets to three weeks with these tricks. My nails are growing longer than ever, and I’m obsessed.
Pros and Cons: What I Loved (and What Tested My Patience)
Let’s break this down like we’re chatting over coffee. I’ve been using Sassy Saints for months now, and I’ve got the scoop on what rocks and what’s a little rocky.
Pros:
- Affordable Luxury: At £69 for 30 manicures, it’s a steal compared to salon acrylics (£40-£60 a pop where I live). My bank account’s doing a happy dance.
- Vivid Colors: The dip powders are fine and vibrant—Sultry Siren sparkled like a dream. With 99 shades, you’re spoiled for choice.
- Nail Strength: My nails felt like they could punch through a wall (not that I tried). The dip powder hardens them up, perfect for my brittle, bendy natural nails.
- No UV Lamp Needed: Drying in 90 seconds without a lamp? Yes, please. No more awkwardly hovering under UV lights or risking skin damage.
- User-Friendly: The videos and numbered bottles made it doable, even for a newbie like me. After three tries, I was Netflix-and-nailing like a pro.
Cons:
- Learning Curve: My first set? A mess. Thick, uneven, and lumpy—think amateur hour. It took me two hours and a lot of swearing to get it right.
- Removal Drama: Soaking in acetone for 15 minutes per hand isn’t my idea of fun. My nails felt dry afterward, and I had to baby them back to health.
- Cracking Risk: If you rush the prep or skip layers, those edges crack fast. I learned this the hard way after a week of wear.
- Messy Application: Powder everywhere—my table looked like a glitter bomb exploded. You’ll need a cover and some patience.
- Customer Service Hiccups: I had a leaky bottle once. They replaced it, but I had to pay return shipping. Not cool for a faulty product.
Overall, the pros outweigh the cons if you’re willing to put in the effort. It’s not perfect, but it’s pretty darn close once you get the hang of it.
Also Read: My Experience With Kur Nail Polish
Sassy Saints Vs. Other Dip Powder Brands
Let’s see how Sassy Saints stacks up against the competition. I’ve tried a few, and here’s my take.
- Sassy Saints Vs. Beetles
Beetles is a budget-friendly kit—around £30 for 20 colors and liquids. I loved the variety, but the powders felt chunkier than Sassy Saints’ fine dust. Application was clumpy, and it chipped in a week on my rough hands. Sassy Saints lasts longer (two to three weeks) and feels smoother, though Beetles wins on price. If you’re a beginner on a tight budget, Beetles is decent, but Sassy Saints’ quality edges it out for me.
- Sassy Saints Vs. Kiara Sky
Kiara Sky’s pro-level kit (£50-£70) screams salon vibes with rich pigments and smooth application. It’s less messy than Sassy Saints—no powder explosions here. But it’s pricier, and you need a UV lamp for some sets, which I hate. Sassy Saints’ no-lamp, £2.29-per-mani deal feels more accessible. Kiara Sky’s durability matches Sassy Saints, but I’d rather save the cash and skip the UV hassle.
- Sassy Saints Vs. Lavender Violets
Lavender Violets (£35) offers 20 shades and a solid starter kit. The colors pop, but the liquids felt harsh—my eyes watered during application. Sassy Saints’ liquids are gentler, and the finish is glossier. Lavender Violets lasted 10 days before chipping, while Sassy Saints pushes past two weeks. For ease and comfort, Sassy Saints wins, though Lavender Violets is a steal if you’re testing the dip waters.
- Sassy Saints Vs. Wakaniya
Wakaniya’s £40 kit comes with 20 powders and a sleek setup. It’s beginner-friendly, but the top coat hardened fast, ruining my brush. Sassy Saints’ brush-cleaning system is smarter, and the mani holds up better—Wakaniya cracked in a week. Wakaniya’s colors are bold, but Sassy Saints’ finer powder and longer wear make it my go-to. Price-wise, they’re close, but Sassy Saints feels more polished.
- Sassy Saints Vs. Glamrdip
Glamrdip (£50) promises toxin-free dipping, and it’s easy to apply—less faff than Sassy Saints’ initial mess. It lasted 10 days, but my nails felt weaker after removal compared to Sassy Saints’ strengthening vibe. Glamrdip’s 18-free formula is a plus if you’re sensitive, but Sassy Saints’ vibrant finish and three-week claim (which I’ve hit) keep it on top for me. Glamrdip’s a solid runner-up, though.
Also Read: My Thoughts On OPI Infinite Shine Nail Polish
Frequently Asked Questions (FAQs)
Cracking’s a bummer, right? It happened to me when I rushed prep or didn’t cap my edges. Make sure you file off all shine, keep product off your skin, and layer properly—four coats if your nails are weak. Thin, even applications beat thick ones. If corners still split, try the apex method (check their site) for extra strength.
It’s a process, but doable. File off the top layer, then soak cotton pads in 100% acetone (not regular polish remover). Wrap your nails in foil with the pads for 15 minutes per hand—warm water or a steam remover speeds it up. Scrape off the softened dip, then moisturize like crazy. Patience is key!
Totally, if you’re into saving cash and time long-term. Sassy Saints costs less than salon visits and outlasts gel polish. There’s a learning curve, and removal’s a pain, but the strength and shine? Worth it. If you hate maintenance or DIY, stick to pros—but I’m sold on the convenience.
Yes, and it’s awesome! I’ve used their half-nail extensions when my natural nails were too short. Apply the tips, then follow the dip process—base, powder, activate, top. They’re less flexible, so cracking’s rare. Perfect for beginners wanting length without the fuss.
Final Thoughts
So, here’s the deal: Sassy Saints isn’t just a nail kit—it’s a vibe. I’ve gone from nail newbie to DIY diva, and you can too. It’s affordable, fun, and delivers that salon glow without the hassle. Grab it, play with it, and watch your nails steal the show. You’ve got nothing to lose (except maybe a little acetone) and everything to gain—trust me, your next mani’s calling.